How To Navigate the TrackNotion App | TrackNotion

How To Navigate the TrackNotion App

TrackNotion’s interface is your command center. It’s built to quickly get you to campaigns, analytics, and account settings so you can spend more time optimizing and less time clicking.

This guide walks you through the layout so you can move around like a pro.


Here’s what you’ll find in this article:

  1. Understanding the Dashboard
  2. Exploring the Left Menu
  3. Top Bar Features
  4. Navigating Key Areas
  5. Handy Navigation Tips

Understanding the Dashboard

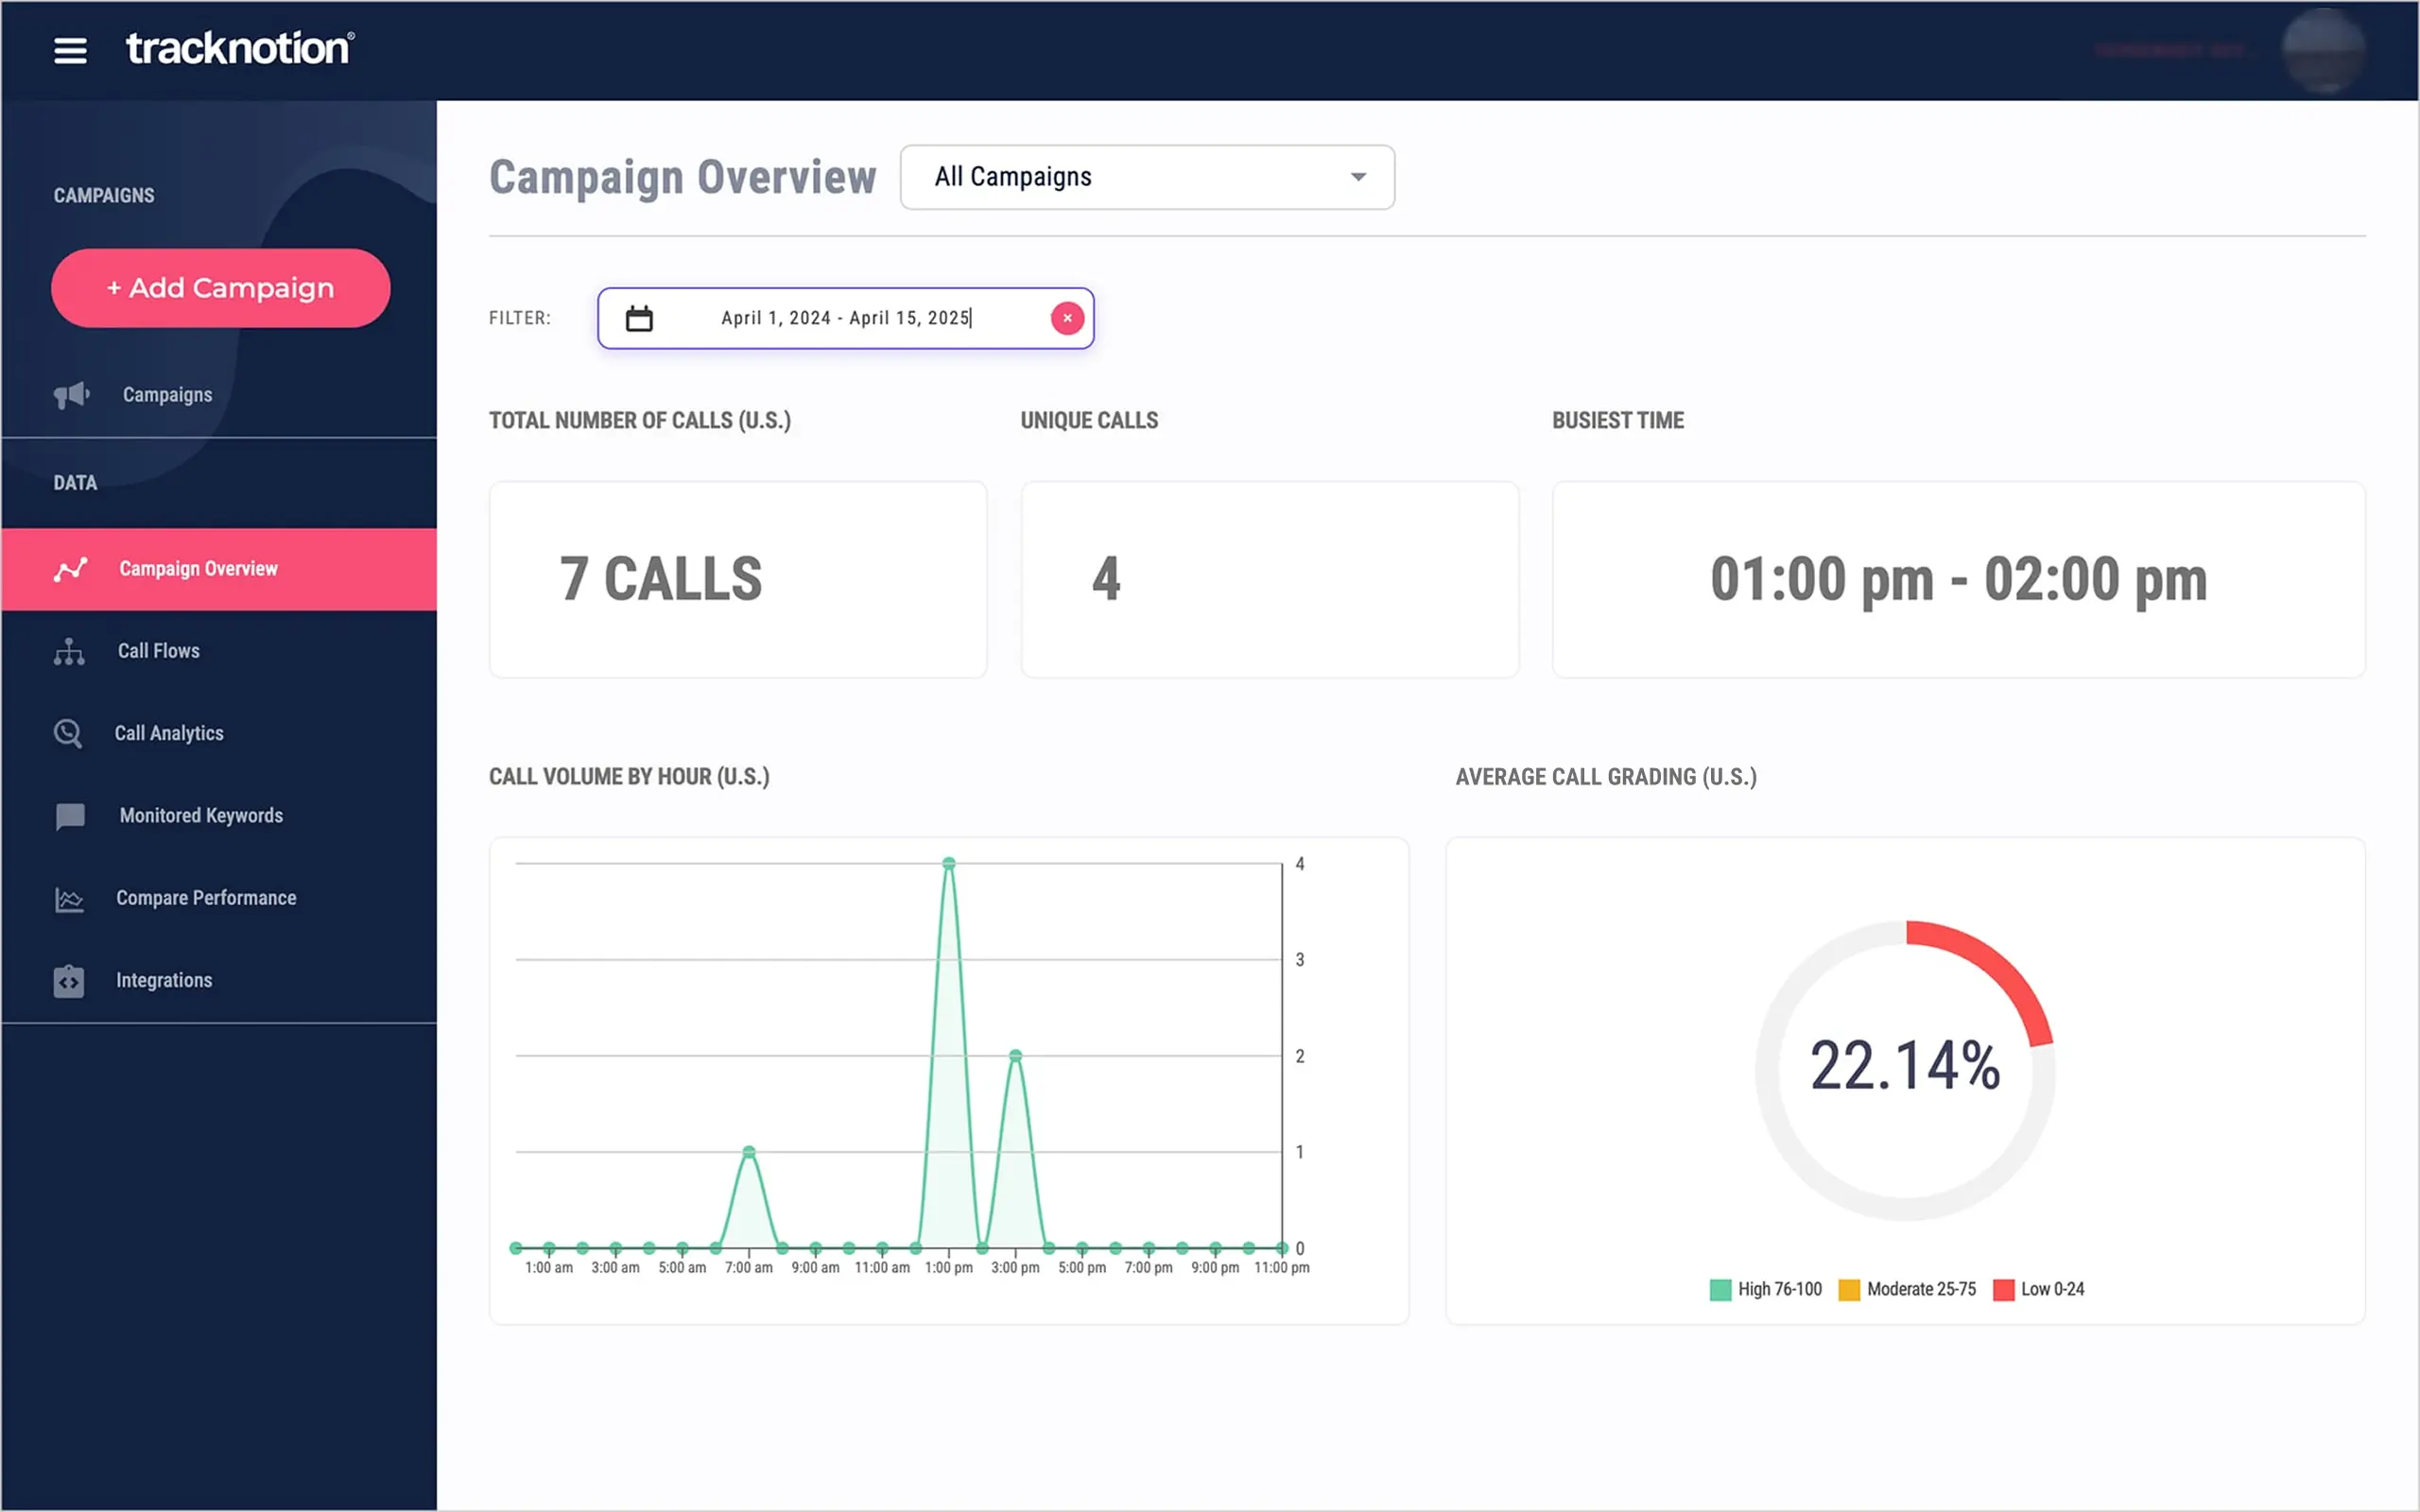
After logging in, the dashboard is your starting point—a quick snapshot of what’s happening with your calls and campaigns.


What You’ll See:

  • Call volume highlights (total and unique calls).
  • Recent campaign activity or alerts.
  • Quick links to add a campaign or dive into analytics.

Why It Helps: Spot trends at a glance—like a spike in calls (see Getting the Most Out of TrackNotion’s Analytics) or a campaign picking up steam.

Tip: Click the TrackNotion logo (top-left) anytime to return here.

Exploring the Left Menu

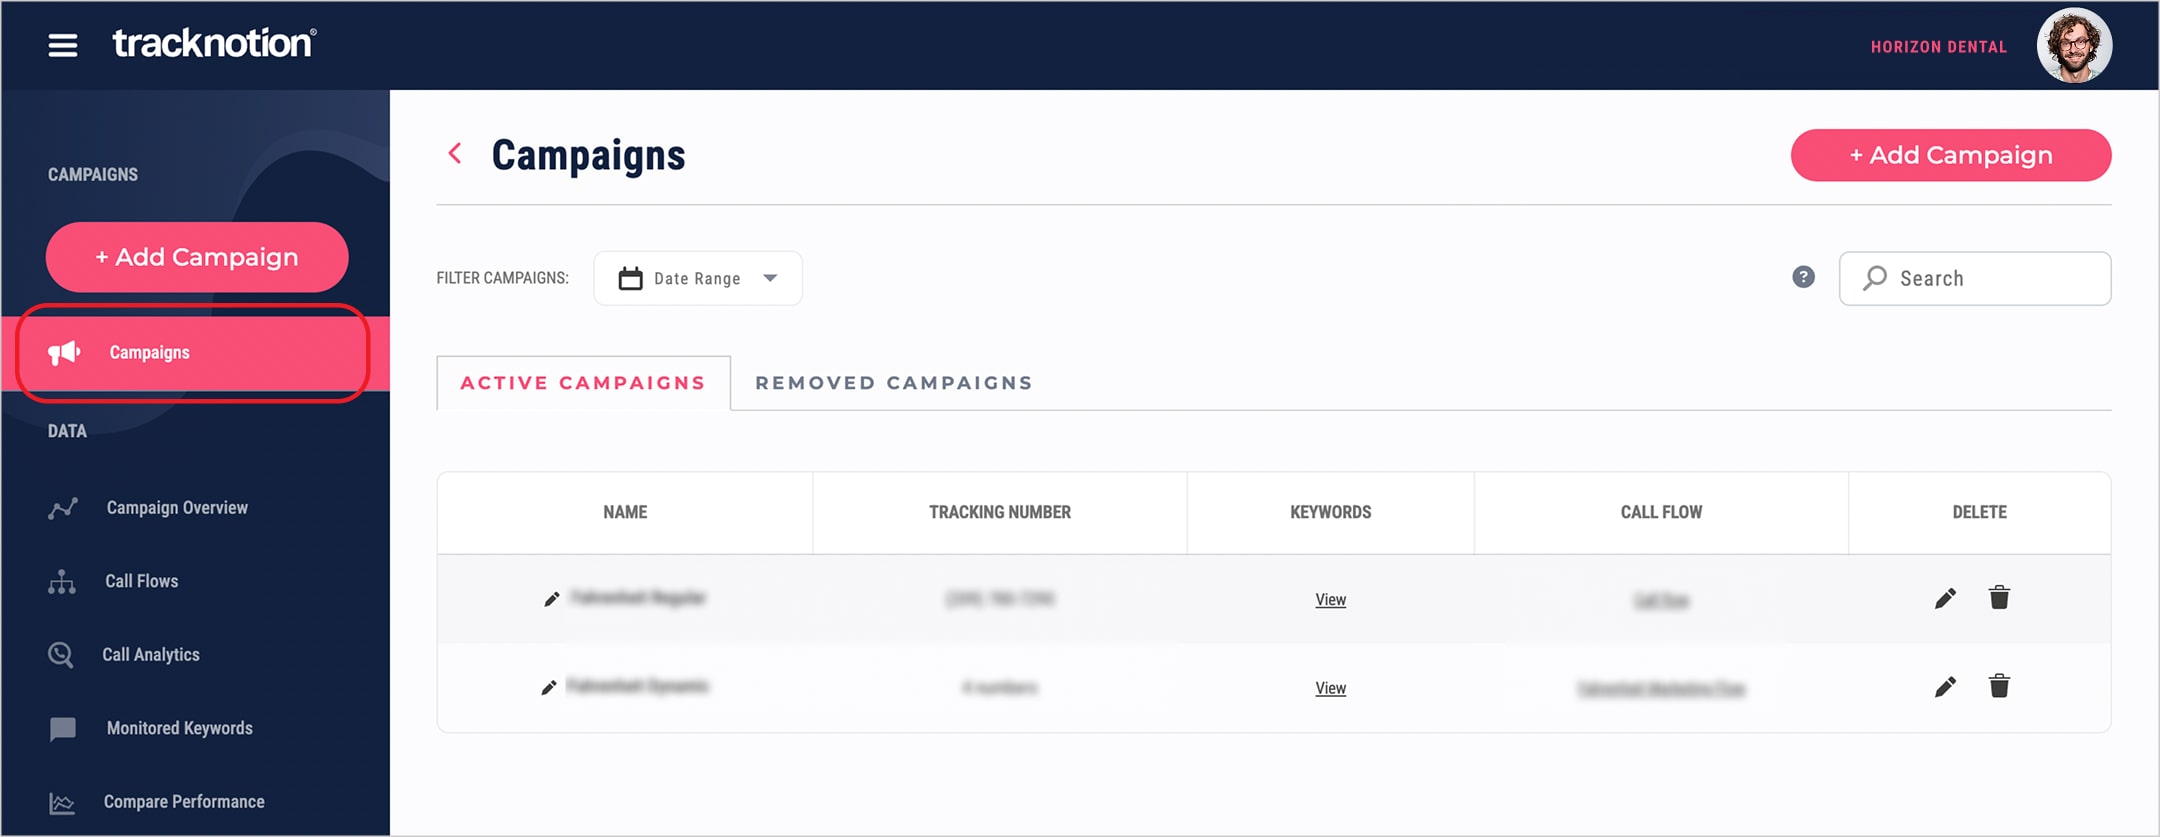
The left sidebar is your navigation hub—everything you need is a click away.

You’ll see three sections: Campaigns, Data, and Account.

Campaigns:

  • View and manage active campaigns.

Data:

  • Campaign Overview – High-level metrics, sentiment, and recordings.
  • Call Flows – Customize how calls are routed or set up voicemail if needed.
  • Call Analytics – Get call-by-call breakdowns.
  • Monitored Keywords – Set up and track keyword performance.
  • Compare Performance – View side-by-side campaign stats.
  • Integrations – Connect with third-party tools and platforms like Google Ads, Zapier, or HubSpot.

Account:

  • Account Settings – Manage your subscription, payments, and alerts.
  • My Profile – Edit your personal details and notification preferences.


Why It Helps: Organized and expandable—jump to any tool without losing your place.

Tip: Hover over icons for tooltips if labels are collapsed.

Top Bar Features

The top bar provides quick access to your account settings—no matter where you are in the app.


In the top right corner, you’ll see your profile icon to access your account quickly or to log out.

Why It Helps: It’s a fast, consistent way to manage your account without navigating menus.

Tip: You can also update your details or notification preferences by clicking into My Profile from the left menu.

Navigating Key Areas

Here’s how to find TrackNotion’s core features:

Want to launch a new campaign?

Need detailed call data?

  • From Left Menu > Data, pick:
    • Campaign Overview for big-picture stats.
    • Call Analytics for call-by-call details.
    • Compare Performance to rank campaigns.
  • Use filters (e.g., date, sentiment) to zoom in.

Call Details:

  • Hit Left Menu > Call Analytics, then click a call for recordings and transcripts.

Tip: Use the search bar (if available) to jump straight to a campaign or call.

Looking to adjust your plan or notifications?


Handy Navigation Tips

  • Shortcuts: Click + Add Campaign from the top bar to skip steps.
  • Help: Click the chat button at the bottom right corner to get your questions answered, or browse our help articles.
  • Filters: Apply them in dashboards to cut through the noise fast.

Wrap-Up

Mastering navigation is the first step to mastering TrackNotion. Start at the Dashboard for a bird's-eye view, use the Left Menu to explore tools, and rely on the Top Bar for shortcuts.


Ready to Explore? Dive into your campaign data and optimize with confidence.

See Tracknotion benefits in action

Insights you should have