- You decide: Should calls ring multiple team members at once, or one at a time?
- You decide: Does the caller reach a receptionist, or hear options like 'Press 1 for Sales'?
- You decide: What happens outside of business hours—do calls go straight to voicemail, or do they forward to an emergency number?
- How do Call Flows work?
- What nodes are available?
- Best practice
- Getting Started with the tool
- A Call Flow example
1. How do Call Flows work?
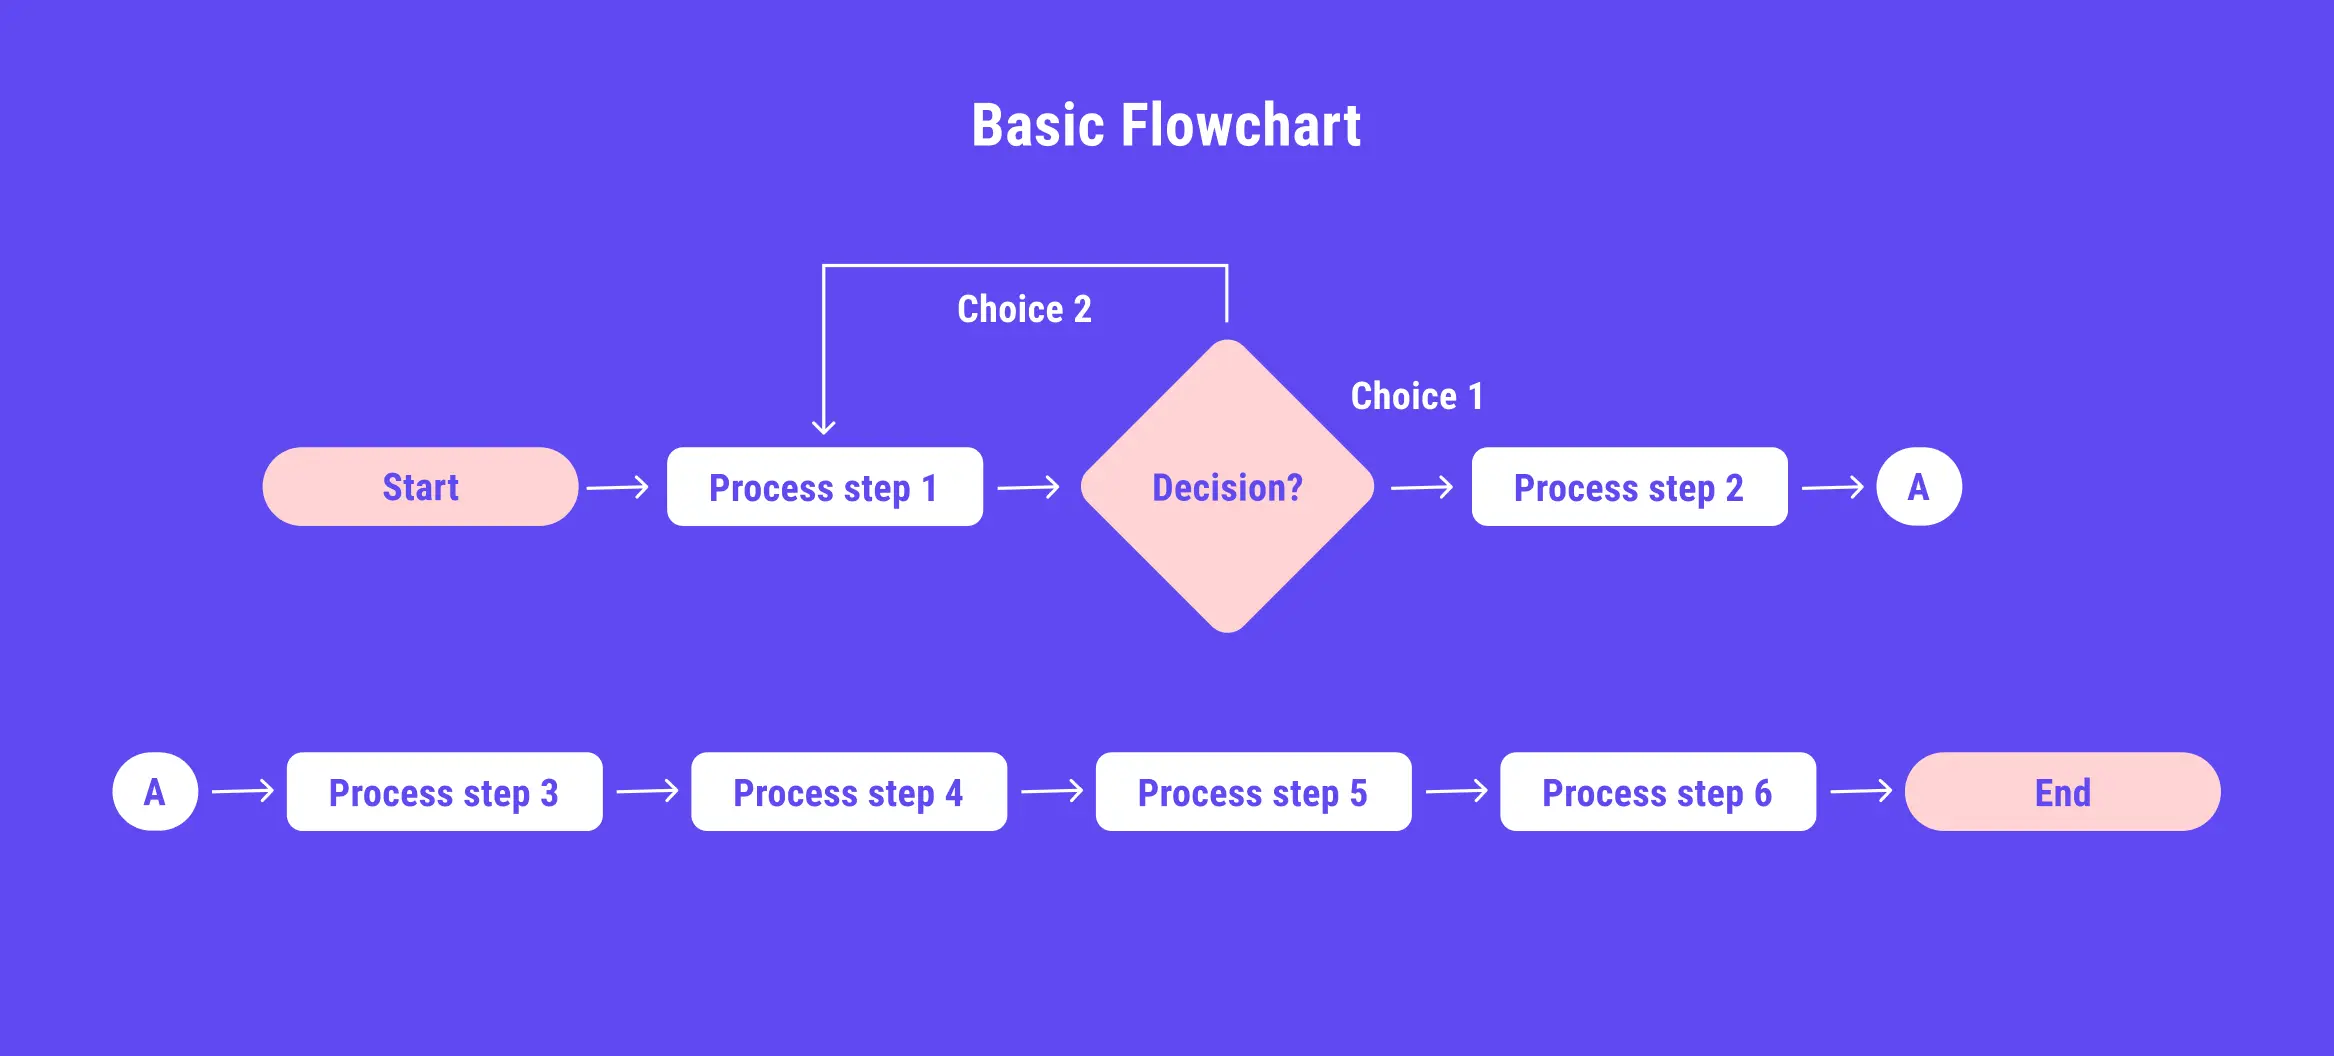
At its core, the Call Flow is a sophisticated visual flowchart that dictates the path of an incoming call. The drag-and-drop interface you use directly translates into a simple, logical system: If this happens, then perform that action.
How the Logic Works:
Every step in your Call Flow (called a Node) is a decision point or an action:
- Trigger (The Start): The flow begins with the Incoming Call node (the "If This").
- Conditions (The Decision): Subsequent nodes introduce conditions (e.g., Time-based checks the time; Menu checks the caller's keypad input).
- Actions (The Outcome): Based on the condition, the call is directed to a specific action (the "Then That"), such as:
- Then That: Play a Greeting.
- Then That: Forward to a number.
- Then That: If no one answers, forward to Voicemail.
This flow chart structure allows you to account for every possible scenario—from the simplest call straight to a phone number, to complex routing based on the time of day, the caller's choice, or agent availability.
The intent is to ensure that your caller never runs into a dead end. There are always fallbacks and alternate routes.
2. What nodes are available?
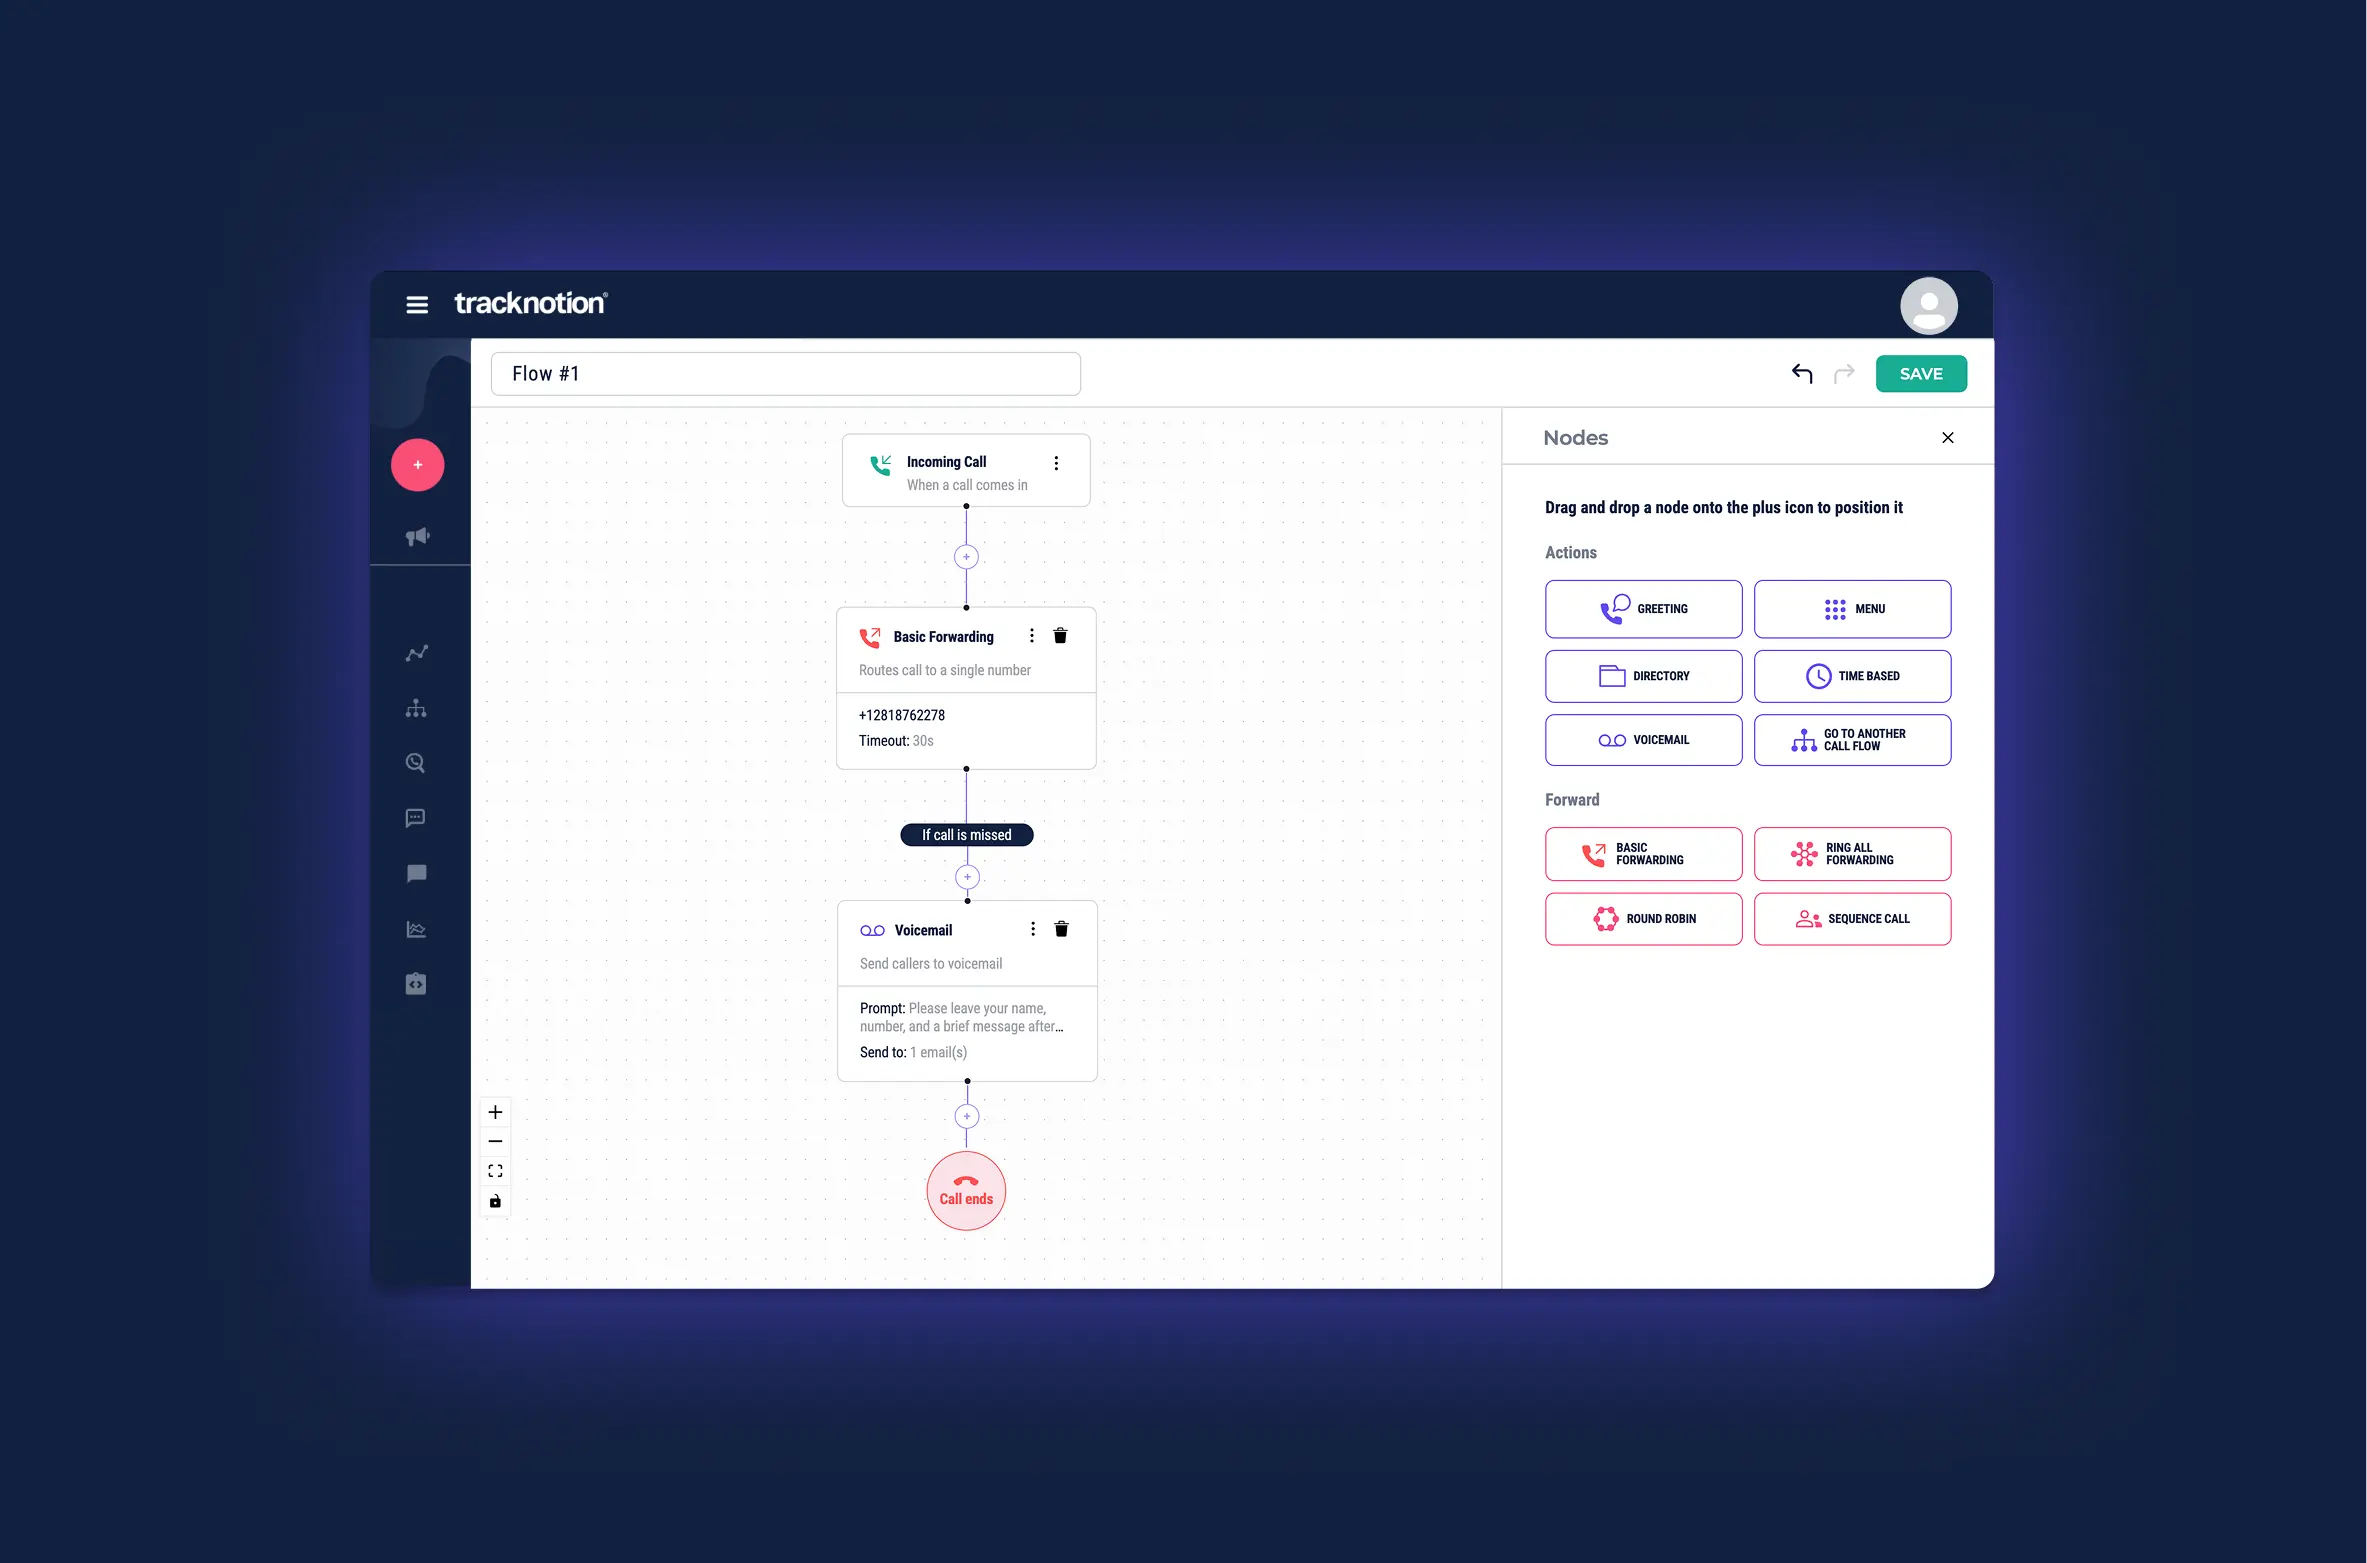
When building your Call Flow, there are several nodes at your disposal. Let’s run through those and unpack their features.
The nodes are divided into two main categories: Actions and Forwarding. Each node has intuitive settings relevant to its function.
1. Actions
- Greeting: A default greeting that you can add (preferably right after the Incoming Call node).
- Menu: Allows you to create a caller journey, giving the caller a set of options (e.g., "Press 1 for Sales...") to select from.
- Extension: Similar to Menu, this allows you to create a list of internal extensions that the caller can select by using their keypad.
- Time-based: Ideal for offices across multiple time zones. This node forwards the caller to the relevant number based on the time of day.
- Go to another call flow: Forwards the call to a different, pre-existing Call Flow. This is useful for attribution or grouping numbers.
2. Forwarding
- Basic Forwarding: Allows you to forward the call to a single, different number.
Ring All Forwarding: Allows you to forward the call to multiple numbers simultaneously. - Round Robin: Distributes incoming calls evenly between a list of agents/numbers.
- Sequence Call: Allows adding a list of numbers. If the first number is not answered, it will be automatically forwarded to the next number on the list.
Each of these nodes can be linked to give your caller a route to a successful conclusion, whether it's reaching the person or the information they need, or leaving a message with the correct agent.
3. Best Practice
You may be tempted to jump in and start building your Call Flow immediately. We highly recommend sketching out your flow before you use the tool.
Here are some considerations:
Step 1: Call Flow Considerations (Questions to Ask)
Use these questions to gauge the complexity of your ideal Call Flow and define its necessary components:
A. Routing and Departments
- How many distinct departments or teams need to be reachable by phone (e.g., Sales, Support, Billing, Emergency)?
- Should all departments be reachable through the menu or directory, or should some have a dedicated direct number?
- Do you utilize an external call center, and if so, at what point in the flow should calls be directed to them?
B. Availability and Fallbacks
- What are your official business hours? Do you have a number that calls can be forwarded to or is voicemail sufficient?
- What is the maximum hold time before a customer is sent to a fallback?
- What is your primary fallback destination if the first agent or team doesn't answer? (A specific manager, a sequence call list, or another department?)
- What is the absolute final destination (the "safety net") if no one answers (e.g., a shared team voicemail)?
C. Agent Routing Logic
- If routing to multiple agents, should the call ring all agents simultaneously (Ring All)?
- Should the calls be distributed evenly and sequentially to the agents (Round Robin)?
- Should calls ring a specific sequence of numbers until one answers (Sequence Call)?
Step 2: Implementation Tips
Once you have mapped your flow, follow these tips to ensure a professional and seamless caller experience:
- Always Provide a Warm Greeting First: Implement a Greeting node right after the Incoming Call node. This assures the caller they have dialed the correct business before they are asked to make any menu selections.
- Build Redundant Fallbacks: Never route to voicemail immediately. Ensure there are at least two different fallbacks (e.g., Ring Person 1, then Ring Person 2, then Ring All, then Voicemail) before directing the caller to the final voicemail node.
- Keep Menus Concise: Limit Menu options to a maximum of 5 choices (plus an option to repeat the menu) to avoid overwhelming the caller.
- End Gracefully: Ensure every possible path leads either to a live connection or a voicemail. Avoid leaving the caller in a space where they feel that they have not been heard.
4. Getting started with the tool
4.1 Start a Call Flow for your Campaign
TrackNotion offers two primary methods for creating your Campaign’s Call Flow:
- During Campaign Creation: This is the initial opportunity. If you are not prepared or are unsure what your flow might look like, you can create it later.
- From the Campaign Overview Screen: This method is used if you opted not to create the flow during the initial campaign creation process.
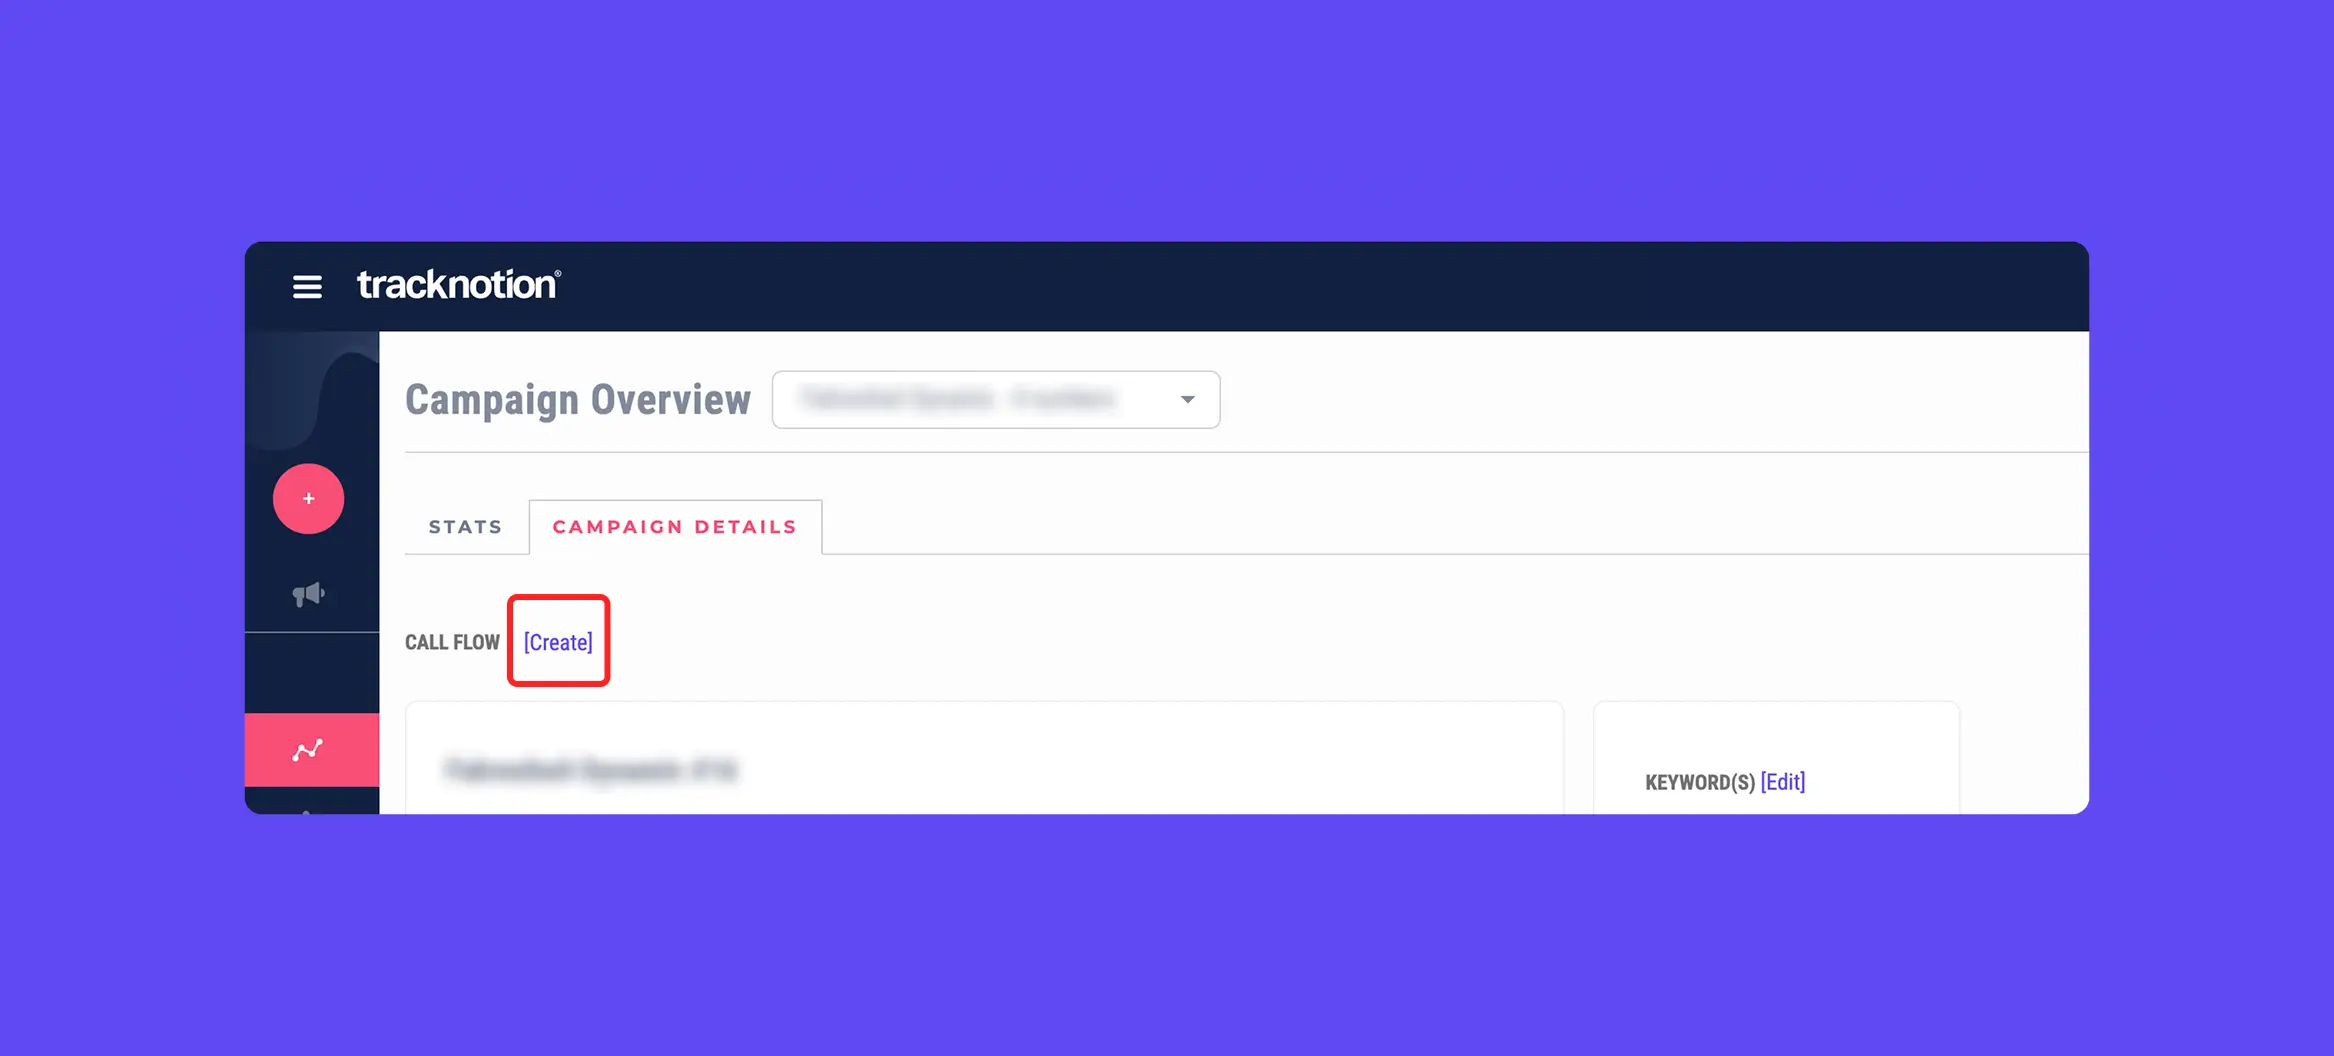
4.1.1 Creating Your Call Flow from the Campaign Overview Screen
This procedure assumes you have already logged into TrackNotion.
- The default screen you will see upon logging in is your Campaign Overview.
- Next to the Campaign Overview title, select your specific campaign from the dropdown menu.
- Click on Campaign Details.
- Next to the Call Flow field, click the Create button.
4.2 Building and Editing Your Call Flow
Once your Campaign's Call Flow is created, it's time to build the journey your caller will experience.
4.2.1 Accessing the Call Flow Editor
- Click on the "Call Flows" menu.
- From the list, locate your campaign's flow and click the Pencil tool (Edit icon) to begin editing.
You will be presented with an easy-to-use drag-and-drop interface, which includes three default nodes already loaded:
- Incoming Call: The action triggered when a customer initiates a call.
- Voicemail: Contains the default settings for your voicemail, including the pre-recorded message and the email address that will be notified of new messages.
- Call Ends: The final action taken when the caller or agent terminates the call.
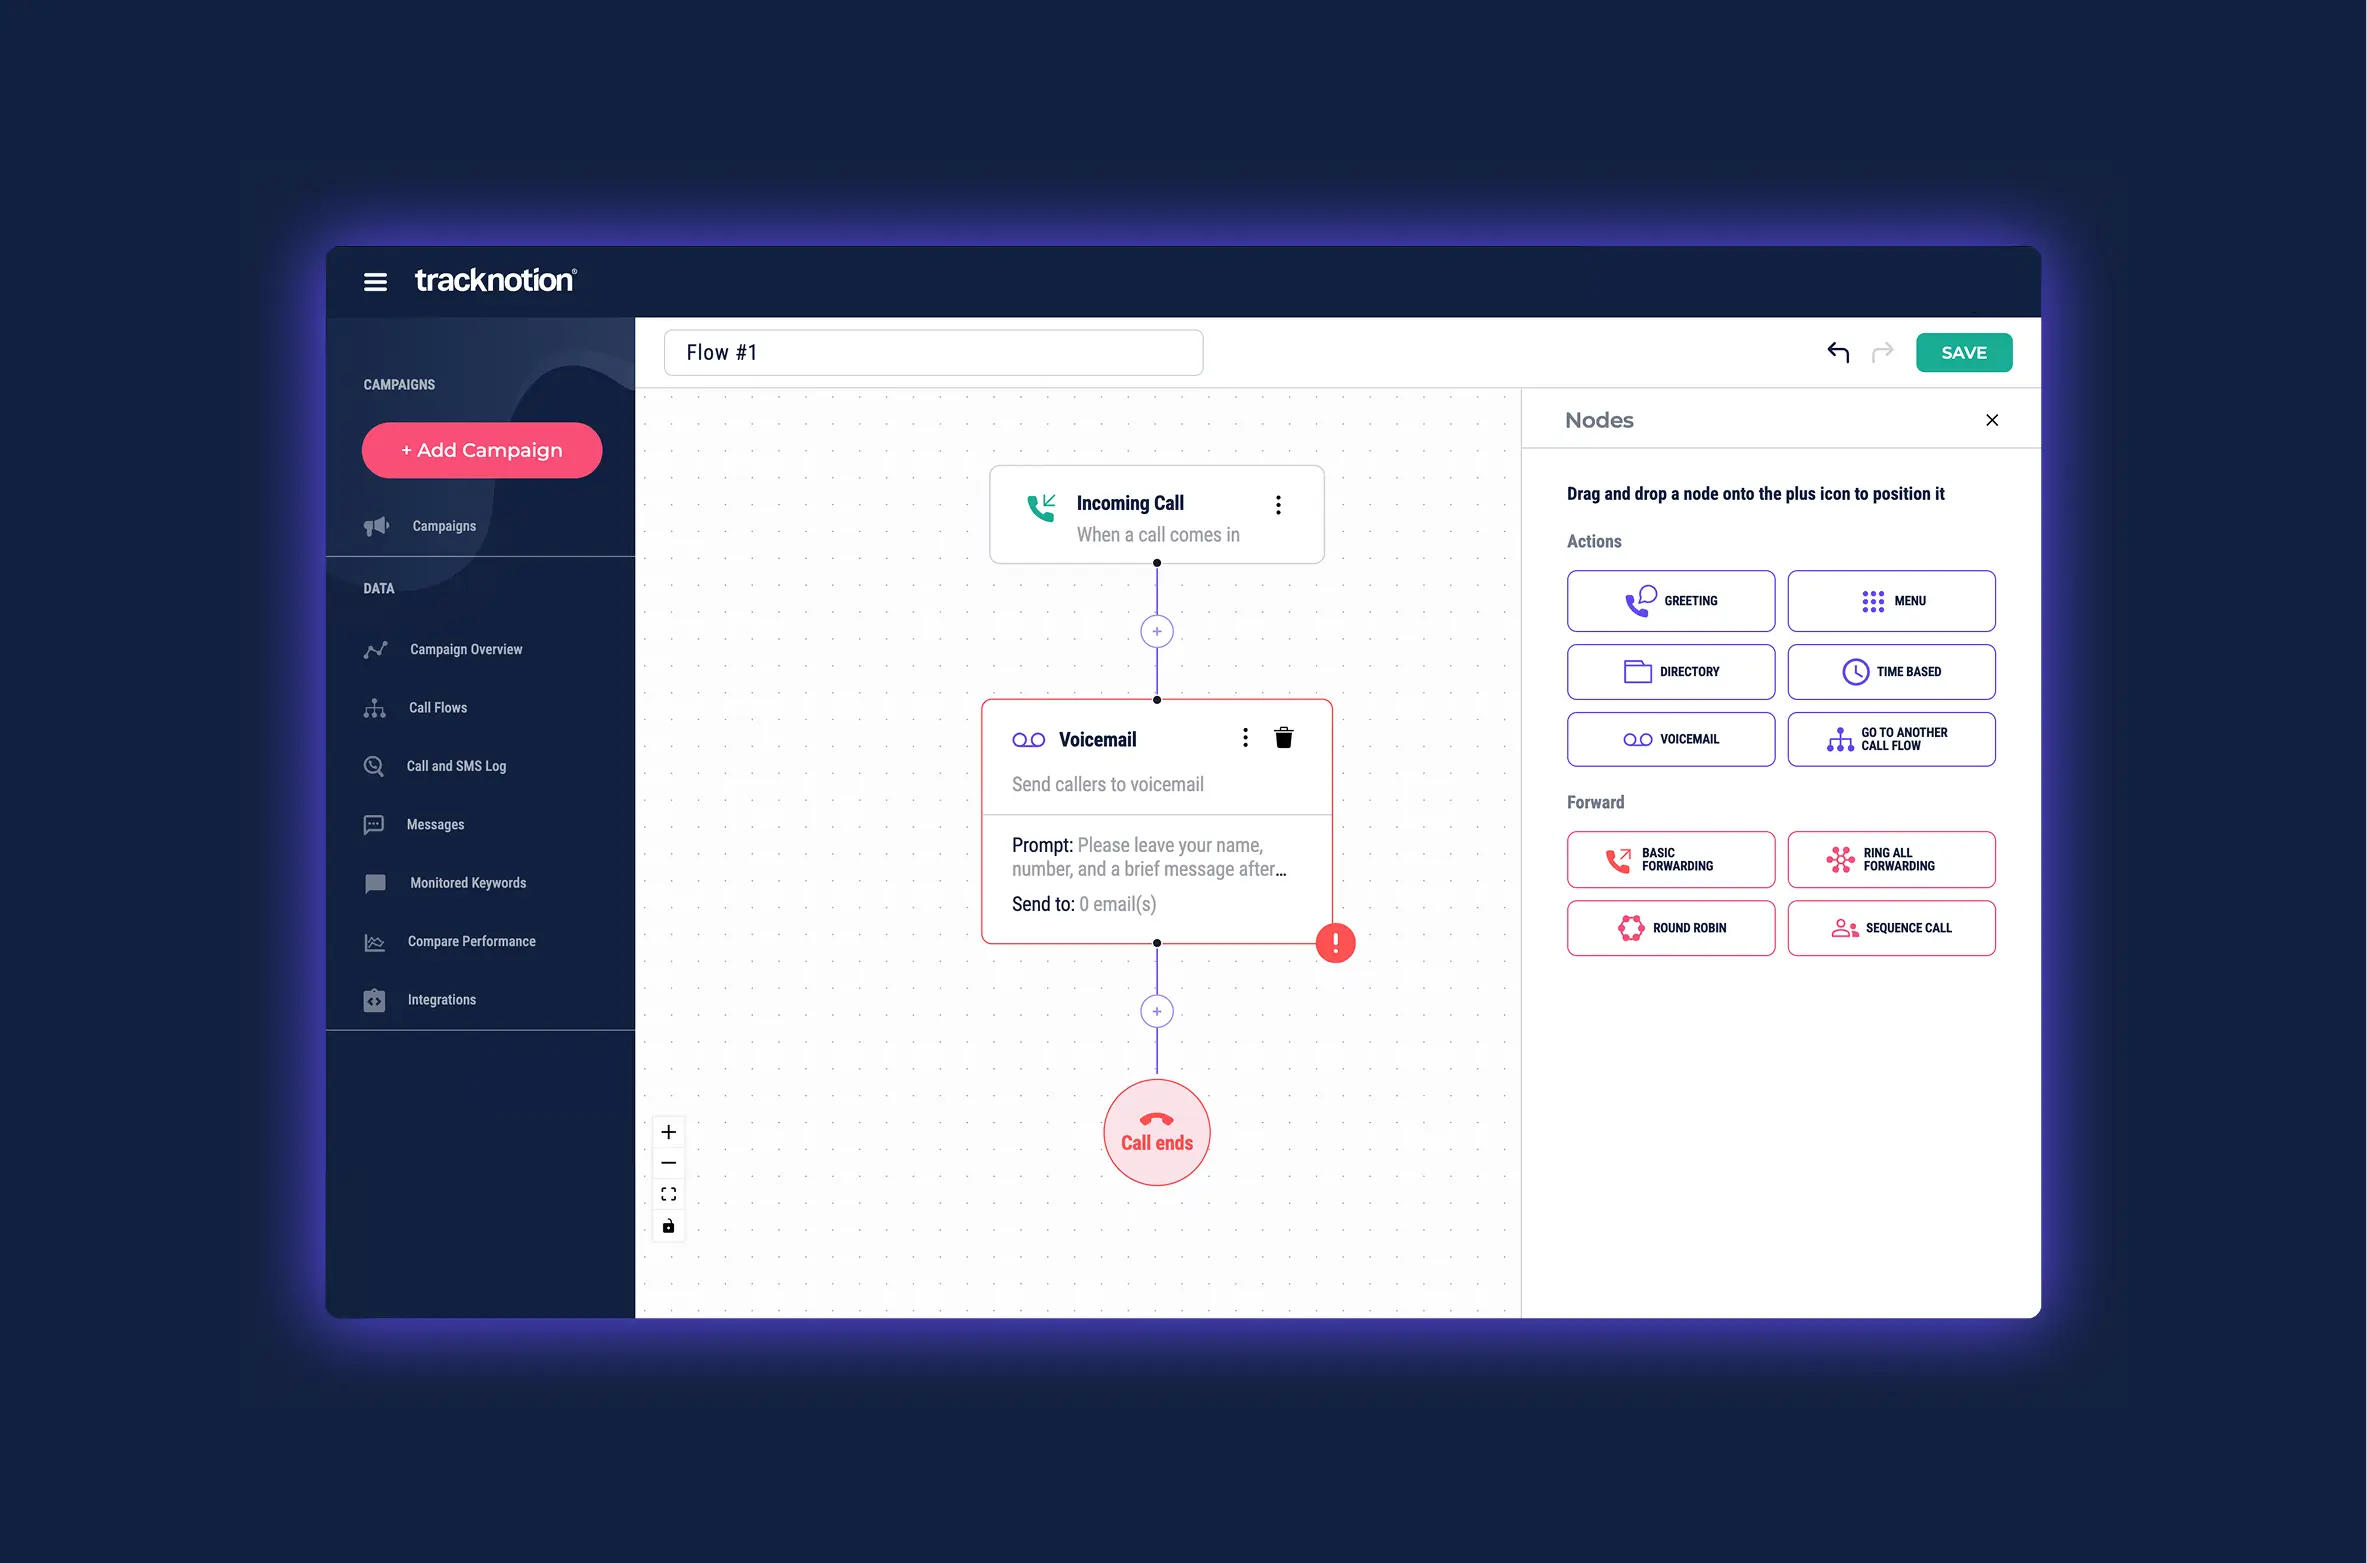
4.2.2 Adding New Steps (Nodes)
To add new steps to your caller's journey, click the + button where you’d like to add an additional step in your caller’s journey.
Remember, this is a sequential process. Always put yourself in your caller's shoes and add nodes only when they enhance the caller experience. Avoid wasting your caller’s time.
5. A Call Flow Example: A Basic Setup
For this example, we’ll step you through a basic flow to help you get the hang of connecting nodes.
Our completed Call Flow will achieve the following:
- Greet the caller with an automated message.
- Ring multiple numbers simultaneously.
- When there’s no answer, route to a senior call agent.
- If there’s still no reply, send the caller to voicemail.
5.1 Step 1: Configure the Incoming Call Node
- Starting with the basic default layout, click the three dots (...) on the Incoming Call node.
- In the settings panel, decide whether the call will be recorded. (Ticking this box will automatically provide your caller with a standard "quality assurance" disclaimer.)
- Select the desired voice for the system messages.
- Click “Save and Continue”.
5.2 Step 2: Add the Greeting
- Click on the + button located between the Incoming Call node and the Voicemail node.
- Select the Greeting action.
- In the Greeting node settings, add the text for the greeting you'd like your caller to hear when they dial in.
- Click “Save and Continue”.
5.3 Step 3: Add and Configure the “Ring All” node
- Click on the + button located between your newly added Greeting node and the Voicemail node.
- Select the Ring All action.
- In the Ring All node settings, add the list of numbers that you’d like to ring simultaneously when a call comes in.
- Ensure that the TimeOut option is sufficient (this is how long the phones will ring before your Flow shifts to the next step).
- Click “Save and Continue”.
5.4 Step 4: Add the final number
This is the ‘last resort’ number. It could be the head of the call centre or in the case of a small business, the owner.
- Add a Basic Forwarding Node.
- Add the “last resort” phone number.
- Click “Save and Continue”.
5.5 Step 5: Make sure your Voice Mail is set up correctly
Time to ensure that the caller can still receive service ASAP. The voice mail feature includes an automatic message and the ability to notify a team member via email for immediate attention.
- Click on the Voice Mail node.
- Update the Prompt to your preferences (this is what will be read to your caller).
- Add an email address for voice mail notifications.
- Click “Save and Continue”.
5.6 Step 6: Save and publish
- Save the call flow to preserve your work.
- Publish the flow to make it live on the tracking number.
- Test it by calling the tracking number to verify that all your options and routing paths work correctly.
We hope that you’ve found our walkthrough useful. If you have any problems, please do not hesitate to contact us.